It’s been a lot of work, but you are doing great. Let’s keep going as we are almost ready to work on your iOS device together. You should still be seeing the message on your screen that Joshin Yamada has connected to your device.
Step-by-step guide to installing TeamViewer for iOS, part 2 (click here for part 1)
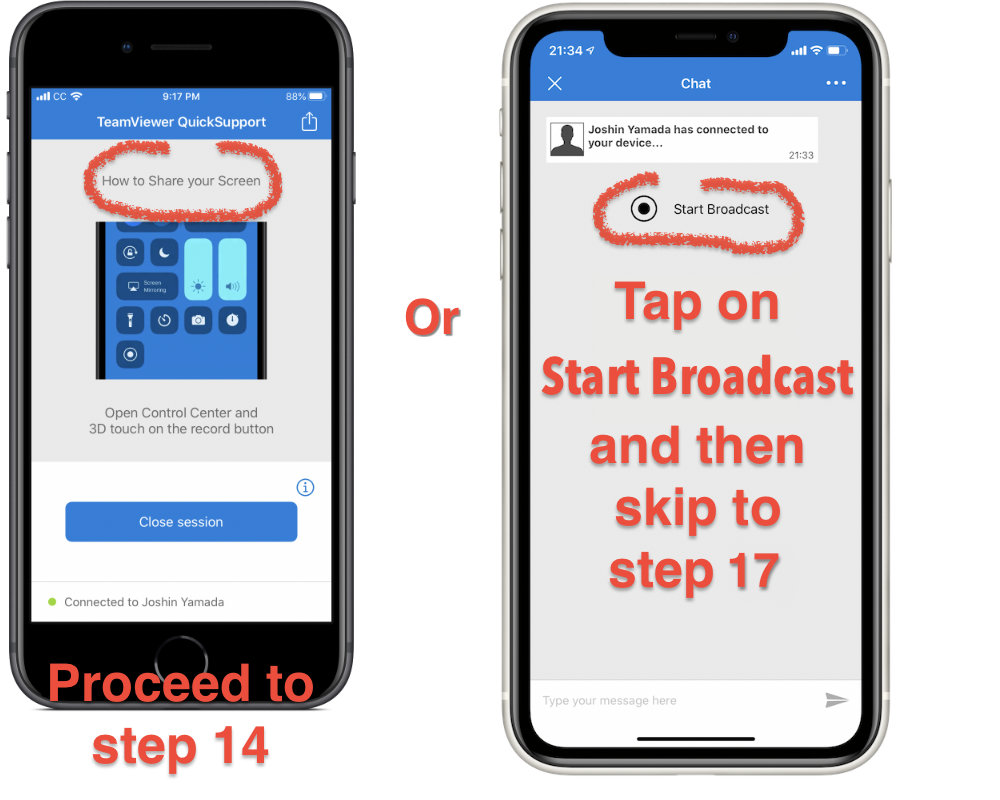
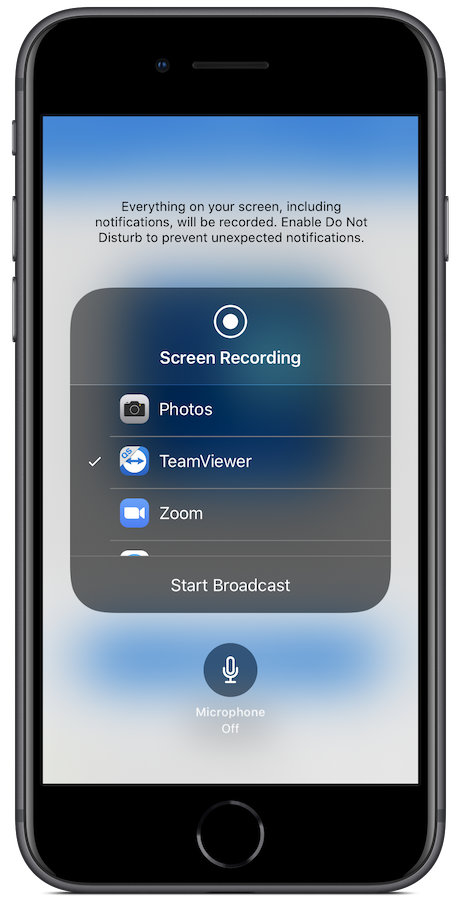
13. Once I’ve connected to your device, I will then initiate Screen Sharing which will then require you to allow Screen Recording. In my experience, some iPhones and iPads will show a blue, animated screen explaining how to share your screen using Control Center while other versions are now ready and can prompt you automatically to Start Screen Broadcast. Let’s look at both situations. If you see the screen on the left, continue to step 14. If you see the screen like on the right, tap the Start Broadcast button and skip to step 17.
14. I am now going to show you how to open Control Center, but the process is different depending on whether you have an iPhone with TouchID and the classic home button on the front (like iPhone SE, iPhone 6 Plus, iPhone 7, or iPhone 8) versus if you have a device with FaceID (phones with a notch like iPhone X, Xs, or Eleven) or an iPad running iPadOS.
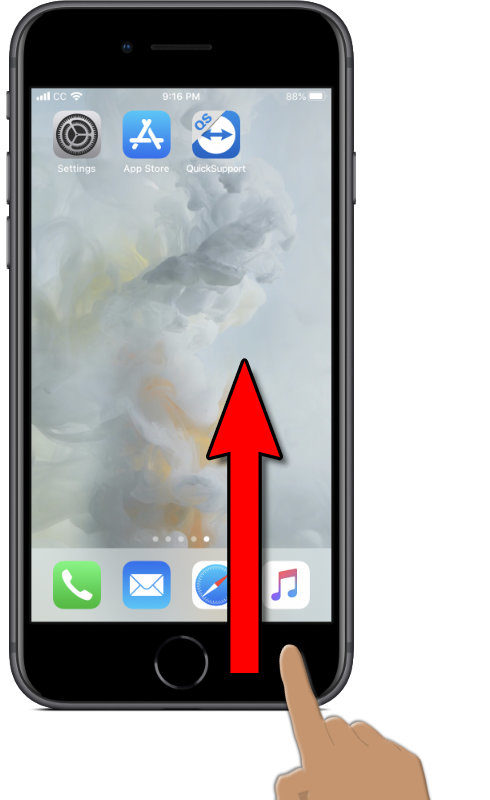
For phones with TouchID (Home Button)
Place your finger below the screen, next to the home button. Drag upwards halfway up the screen and the Control Center tray should slide up.

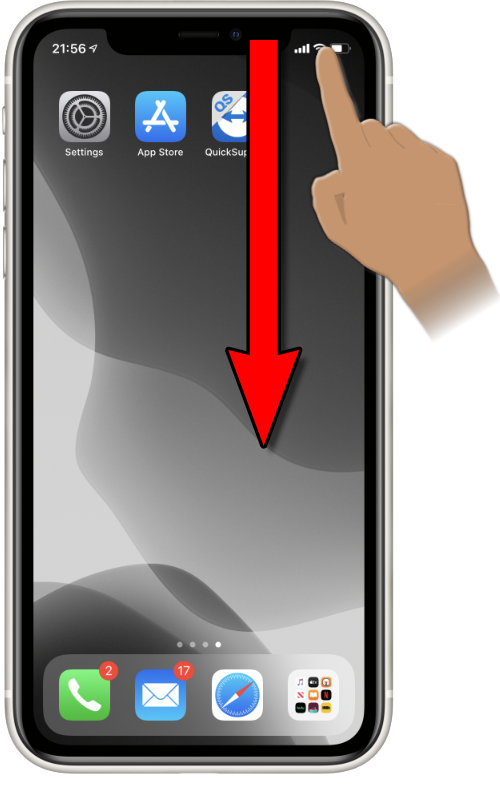
For phones with FaceID (Notch) and iPadOS
Place your finger over the battery icon (the upper right “horn”). Drag downwards and the Control Center tray should slide down.

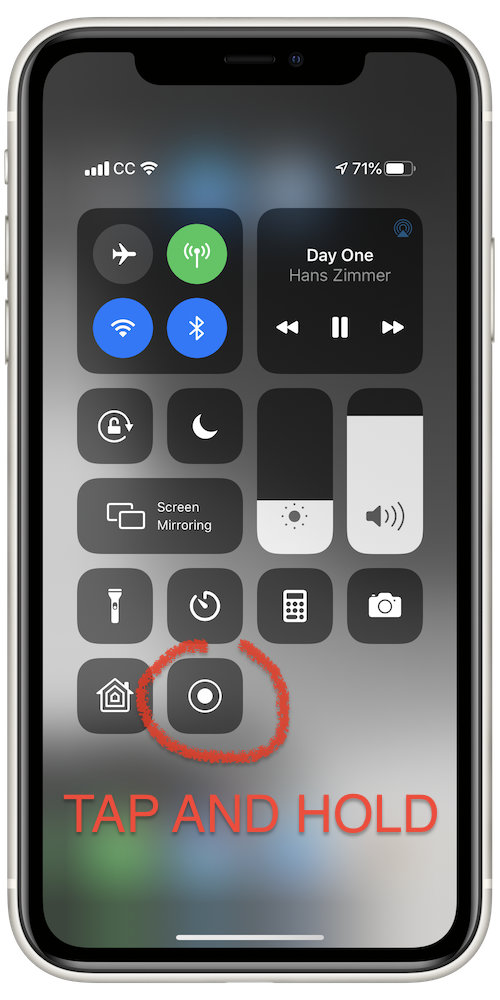
15) You should now see the Screen Recording button, which looks like a Target (solid circle within a circle).
TAP AND HOLD the icon and after a few moments the Screen Recording options window will open. From there, you can choose TeamViewer and you will see the button change from Screen Recording to Screen Broadcasting.
DO NOT JUST TAP IT. If you do, the phone will default to recording your screen as a movie and saving it in your Photos app. If the button starts blinking red, tap it quick to stop it, then try pressing your finger onto the icon and holding one more time.
16. If everything went well, you should see the Screen Recording options screen.
Photos should currently be highlighted and the option below should say Start Recording but don’t tap on it yet.

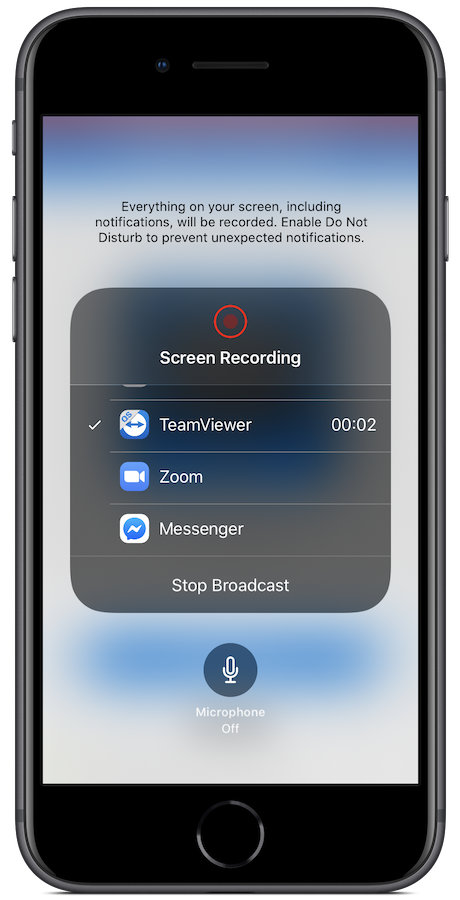
17. Scroll through the list until you see TeamViewer and tap on it. The option below should change to Start Broadcasting. Tap on Start Broadcasting and a red light and a countdown timer will appear.
18. Everything should be set and in about 10-30 seconds, I should be able to start seeing your screen on my computer. I will let you know if it worked.
Congratulations!
![]()