I have for many years been using a program called Team Viewer to offer my clients the convenience of having me be able to control their computers remotely. It was nice that they didn’t always have to wait for a time when we could meet physically in person, and it is especially prescient now that we can still use this system to help you during this time.
I am super grateful that there is a solution that can allow me to look on your iPhone or iPad and see what you are seeing, but I also think that the system can be clunky and error prone. In a nutshell, there are two big limitations:
- Apple is super protective about keeping scammers from abusing iOS users, so it takes several steps just to get up and running with the TeamViewer application. Initial setup is especially confusing, so that is why I am making this guide. In fact, it is often easier for me to talk you through over the phone so feel free to contact me.
- Apple is super protective of battery life on iOS devices, so the operating system will very aggressively terminate background processes. What took me a long time to comprehend is that the process that TeamViewer works by is that the QuickSupport app just exists to help people find each other to connect. Then the screen sharing has to get handed off to a built-in mechanism of iOS called Screen Sharing and the TeamViewer program gets left behind. After 1 minute of being in the background, the operating system forces the QuickSupport app to terminate. In theory, the screen sharing should continue smoothly but it often does not, thus requiring the TeamViewer program to be started again and the ScreenSharing system to have to be restarted.
Despite all the hardships, it is still worth it and it is a tremendous aid for my assisting you. Let’s take a look at the best way to get set up.
Step-by-step guide to installing TeamViewer for iOS, part 1 (click here for part 2)
1. You will need to download the TeamViewer QuickSupport app for iOS, but I would suggest you wait until getting to the bottom of this guide where I will place another link to where you can download the program from theApp Store.
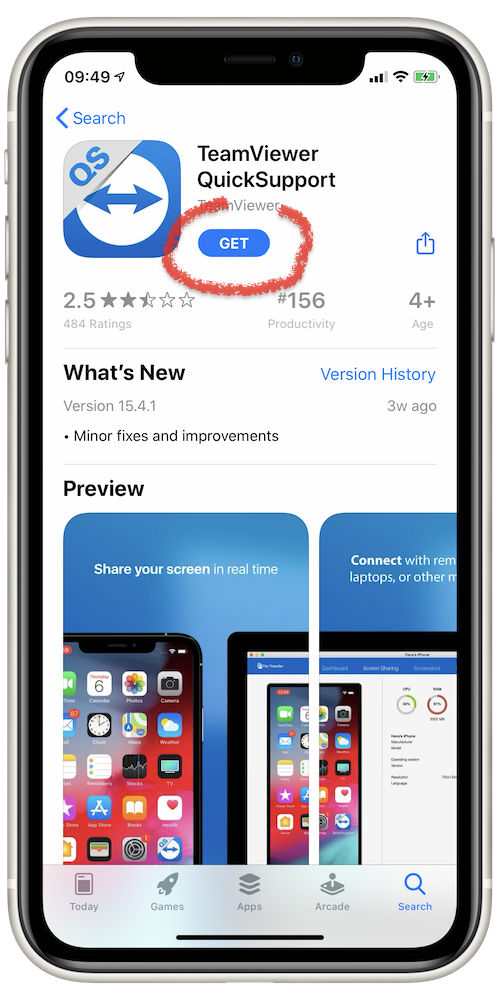
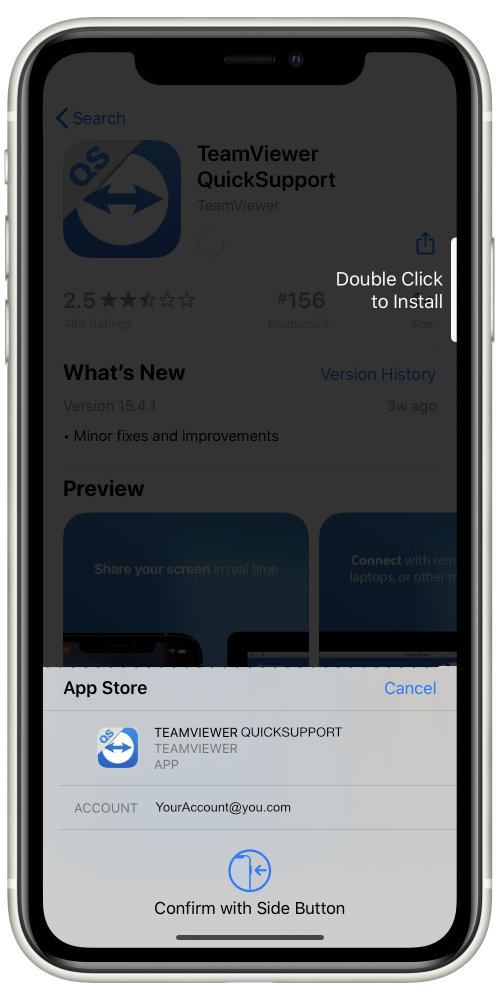
2. Click on the Get button in order to begin “purchasing” the app for free. This registers the “purchase” to your AppleID account. You will be asked for your Password.
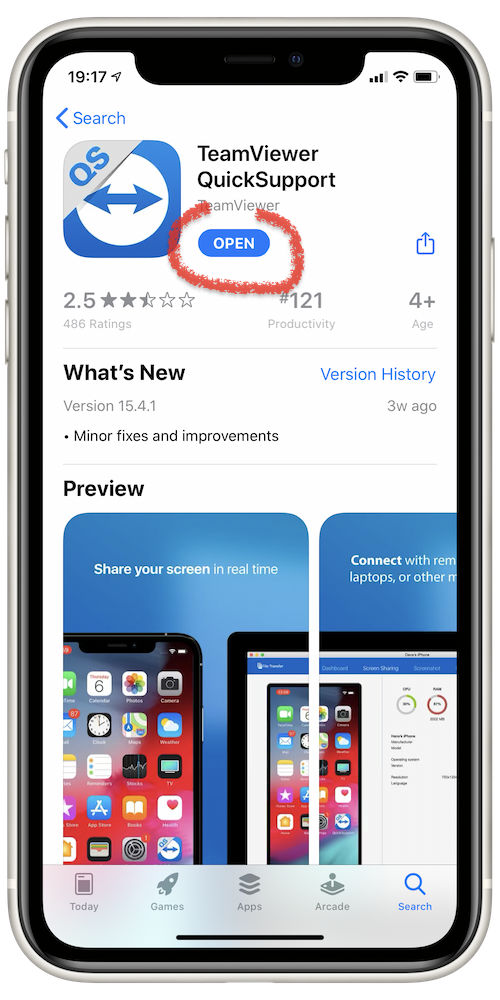
3. When done, the button will change from Get to Open. You could simply press Open, but it’s not always clear on which page news app will be saved, so I like to go back to the main page of apps and find the TeamViewer manually. In addition, we can do one other thing to make life easier.
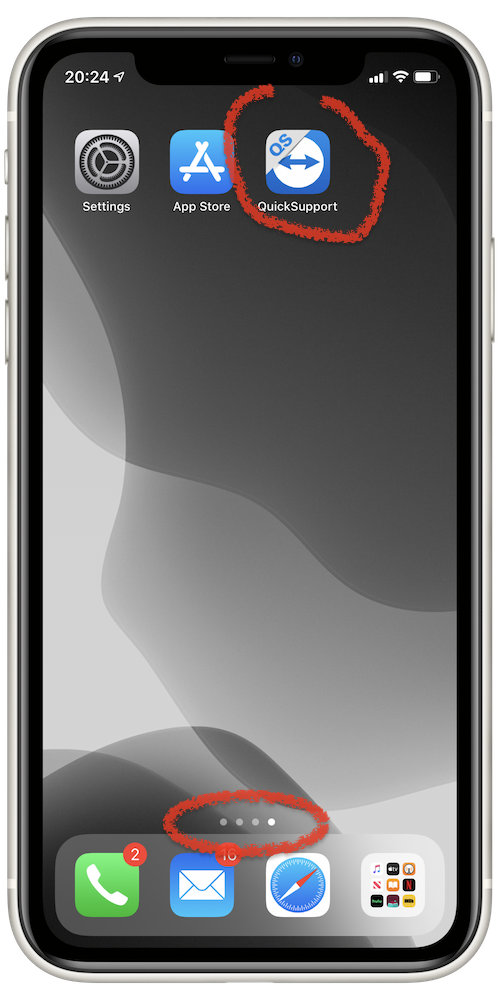
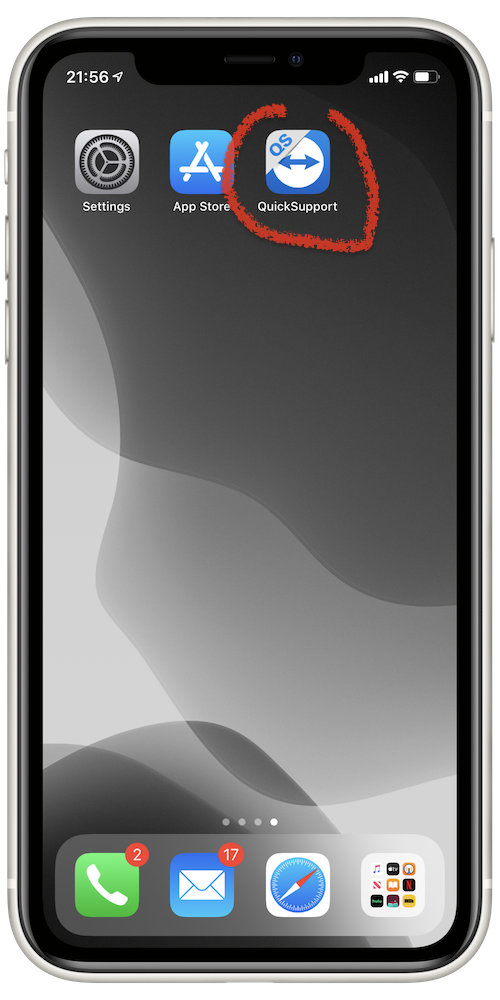
4. Press the Home Button (or swipe up from the bottom of the screen on devices with FaceID) to go to the main screen of apps. We will then scroll around until you find the TeamViewer QuickSupport icon. Memorize which page it is on. In this example, you can see that it is on the fourth page.
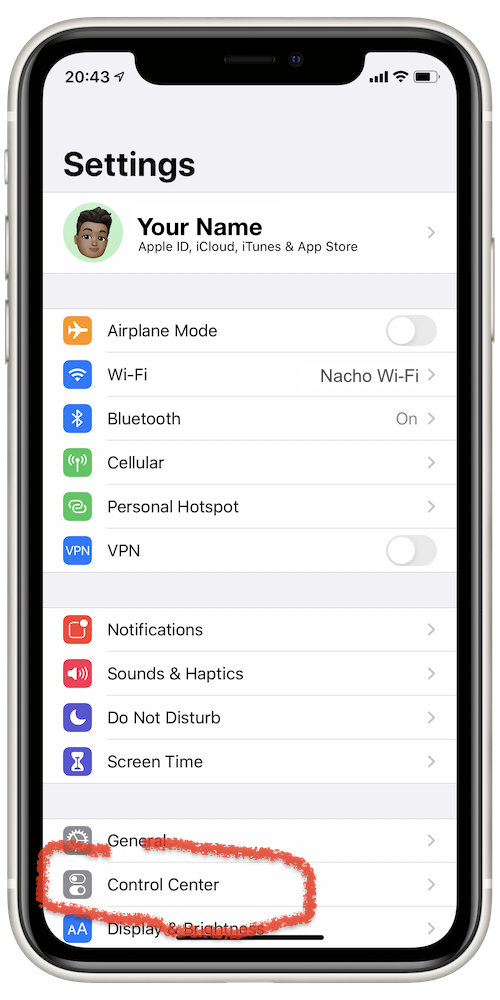
5. TeamViewer QuickSupport relies on a feature built in to iOS 11 and later. Unfortunately, you will need to dip into the Settings app in order to provide yourself easy-access to the Screen Recording feature. So click on the Settings app and then tap on the Control Center panel.
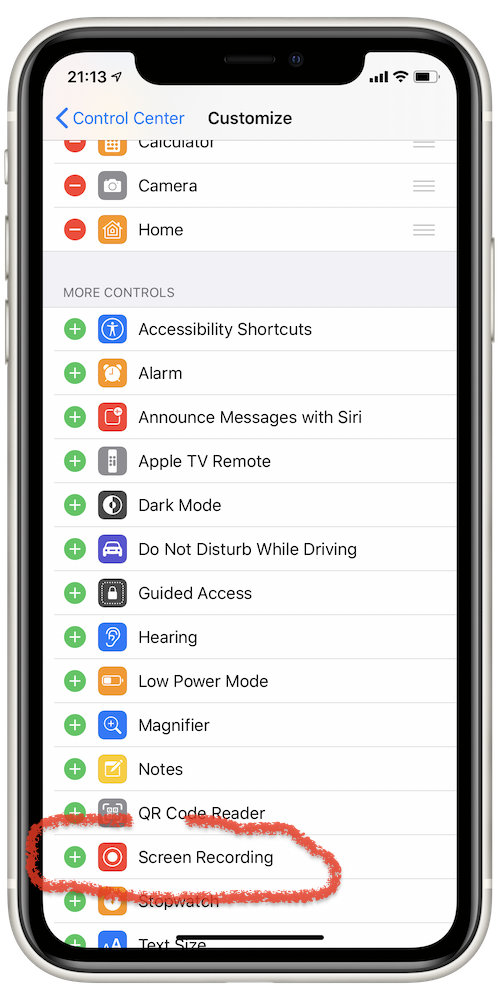
6. Find the Screen Recording button in the second section labeled More Controls, which is where you find controls that are currently turned off. Screen Recording should have a green plus button next to it.
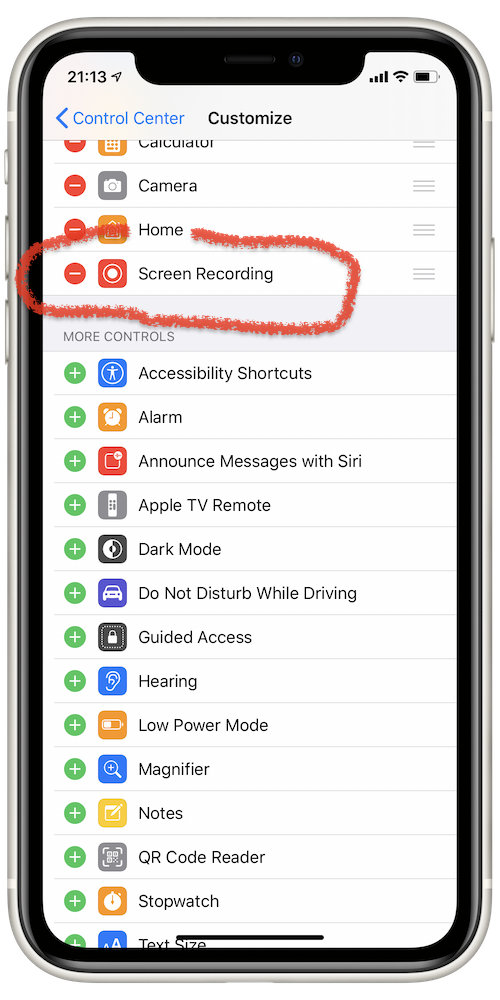
7. Tap the Green Plus button in order to activate the control. Don’t be surprised as it disappears as it moves up into the above section.
8. Now let’s try starting up the TeamViewer QuickSupport program. Tap on the icon for QuickSupport.
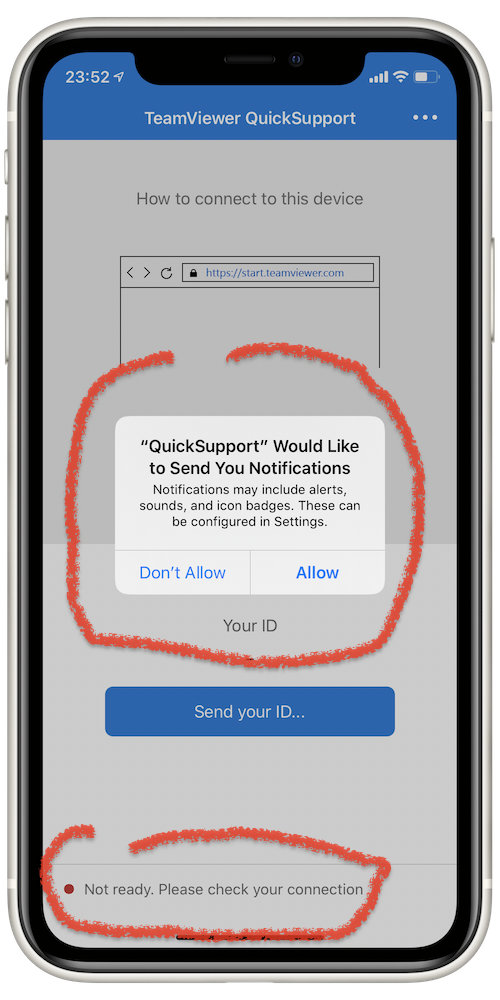
9. The first thing QuickSupport will do is ask you if you would like to receive Notifications. Please Allow this as the only time you will see notifications is when I am requesting permission to connect to your device. Additionally, note that there will be a message at the bottom of the screen that says “TeamViewer is not ready”, accompanied by a little red dot.
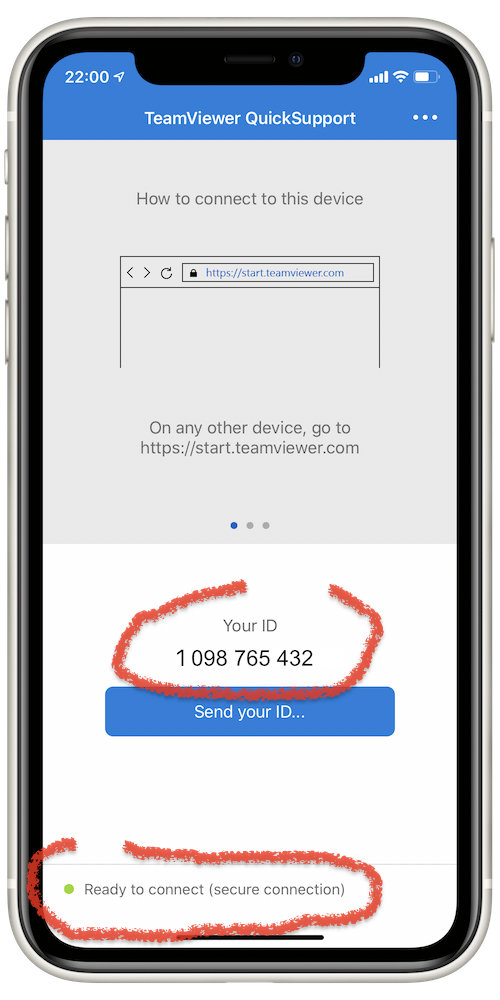
10. The program will sign-in with TeamViewer’s servers and presently the message at the bottom will change to “Ready to connect” accompanied by a green light. At that point you will also see an ID number, which I will need you to tell me so go ahead andcontact me.
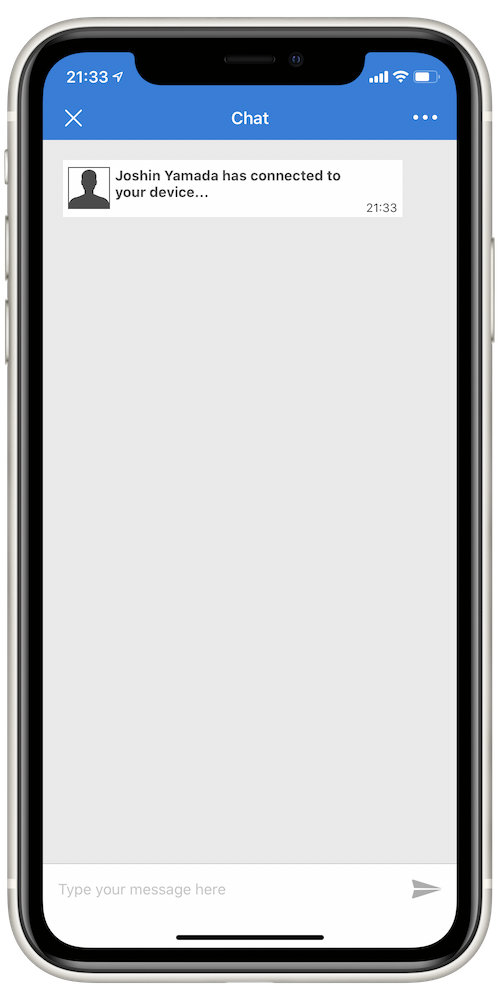
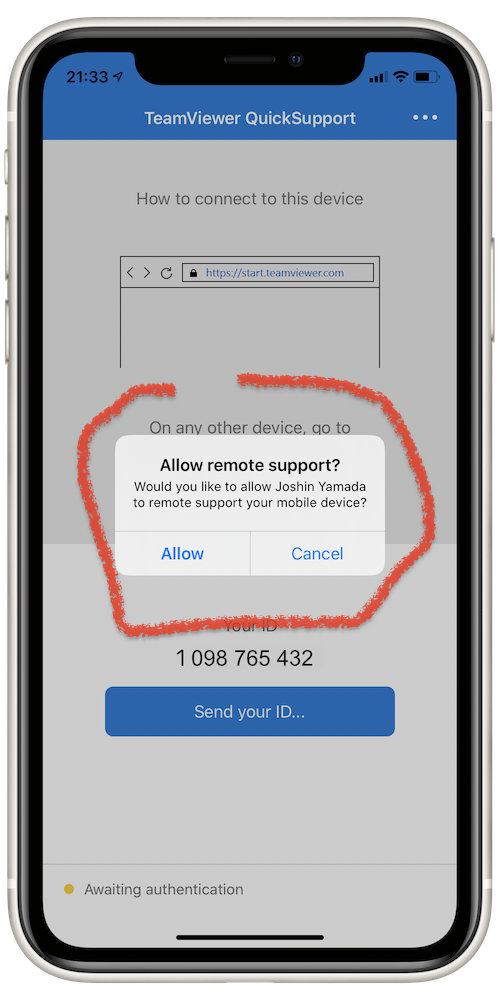
11. I will record your ID so that we can connect more easily in the future, and then I will try to connect to your device. You will get a notification that Joshin Yamada is trying to connect. Please Allow me to connect to your device.
12. You should see the following message that Joshin Yamada has connected to your device.