I am a long time Apple Mac user and I have become set in my ways. Apple has made changes to their default settings over the years, and I don’t always like all the changes that Apple has made.
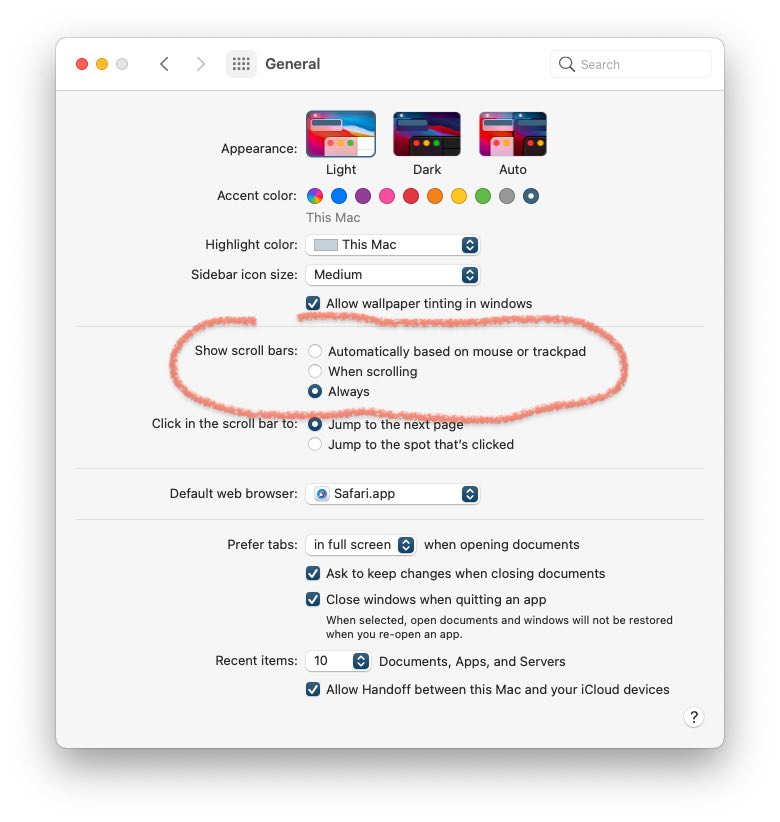
- Turn on scrollbars— Even though I really like to be use a 2–finger swipe to scroll on my MagicTrackpad, I still like to have the scrollbars visible on my Mac. Before the advent of iPhones with touch screens, scrollbars were the norm. Apple tried to make things look sleeker by hiding the scrollbars on the Mac, but I still prefer for them always to be visible. If you go to System Preferences: General, you can set your scrollbars to be always visible.
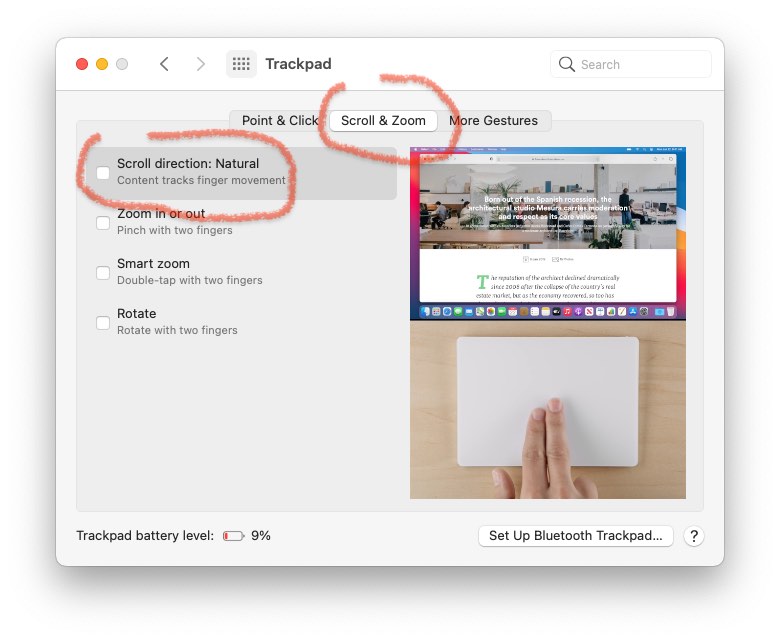
- Scrolling direction unnatural— Speaking of how mice/trackpads work, Apple changed the default direction for scrolling. Back in the 1990s, I started using mice with scroll wheels and it felt natural at the time to turn the scroll wheel on my mouse in a downwards motion in order to scroll downwards. Once the iPhone came out, Apple was faced with a dilemma in that with an iPhone, you are conceptually pushing a piece of paper around on your phone’s screen. In that sense, you would push the paper upwards if you want to see something further down the page. Apple changed the default scrolling in Mac OS X 10.7 Lion in order to make the default scrolling match the iPhone. I would suggest going to System Preferences: Trackpad or System Preferences: Mouse in order to turn off the scroll direction “Natural” setting.
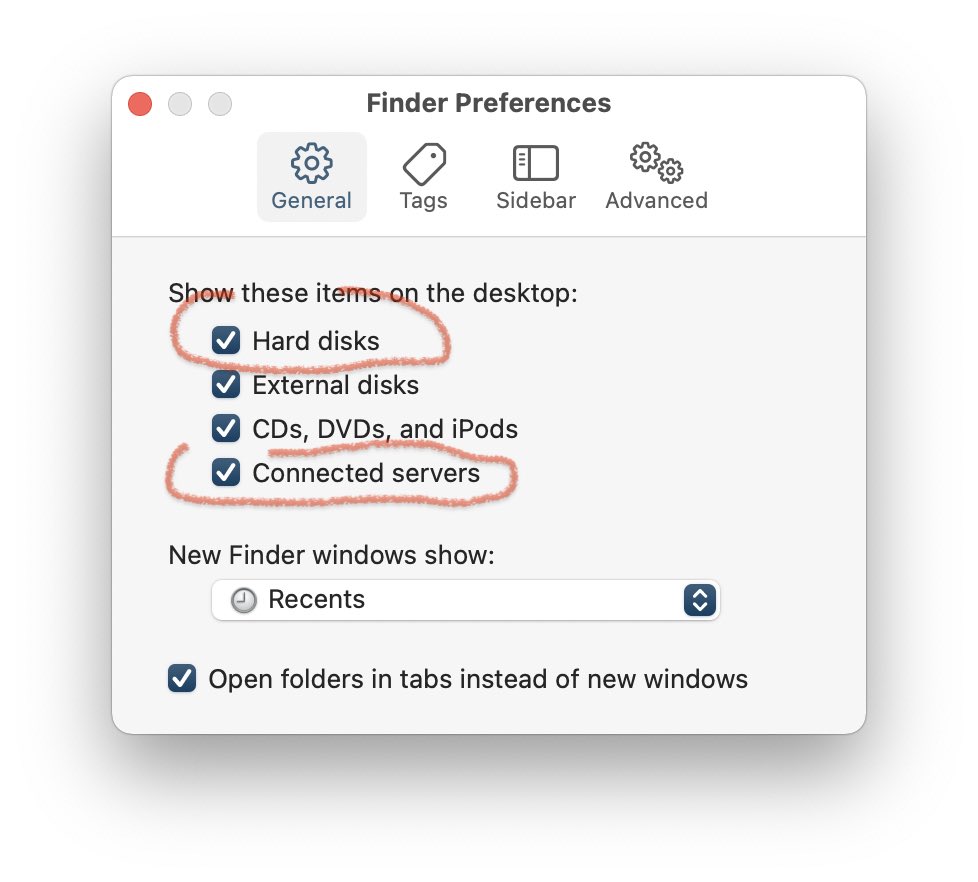
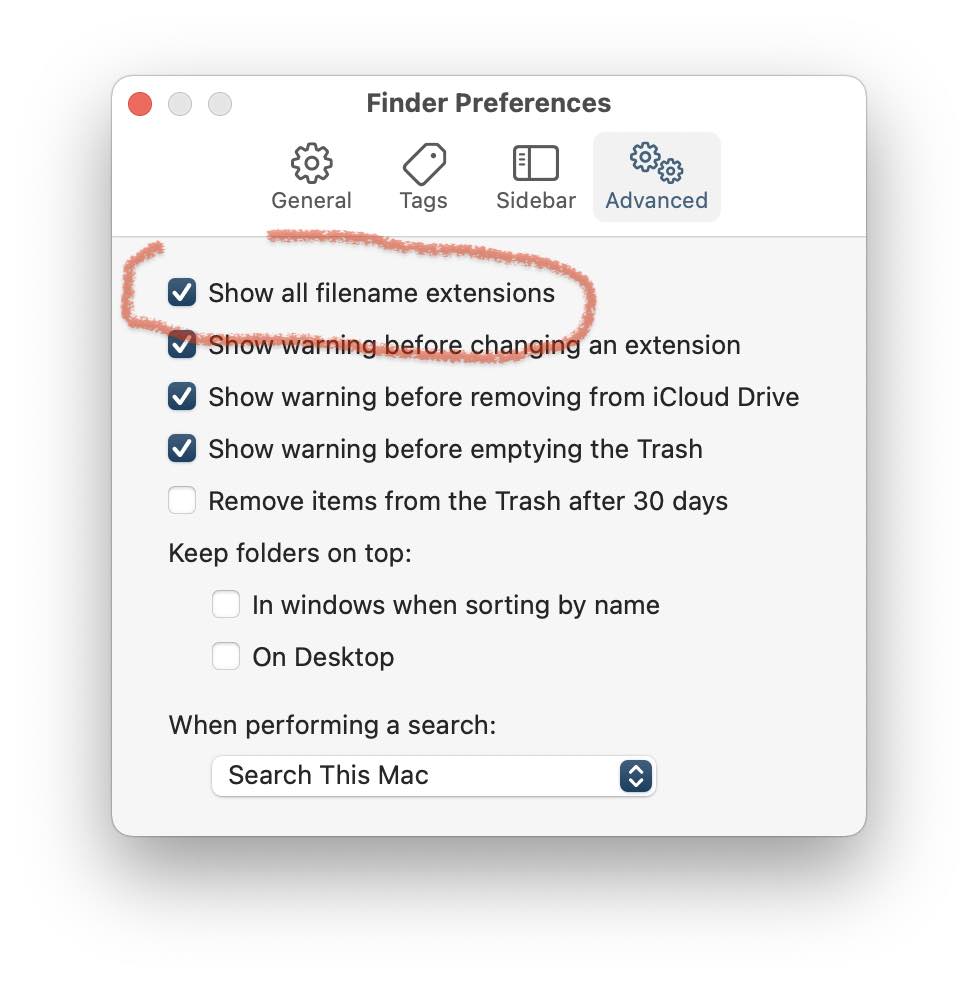
- Show your hard drives and your filename extensions in the Finder— Macintosh computers always used to show you an icon for your hard drive right on the desktop. This helped to teach you about the hierarchical filing system by letting you click on a folder and see the folders nested inside. You could drill down to a specific folder to save a file for your project. I still prefer to see an icon for my hard drive right on the desktop. Filename extensions were a necessary feature for Windows computers which have no way of knowing what application can open a particular file unless the name contains a 3 or 4 letter extension to identify the file type. I prefer to always see those extensions. For instance, if I look at my digital camera’s photos, I can instantly tell which file is a JPEG and which is a RAW photo by seeing the .JPG or .CR2 extensions on two otherwise identical photographs. You can go to the Finder: Preferences to turn on Show Hard Drives and Show Filename Extensions.
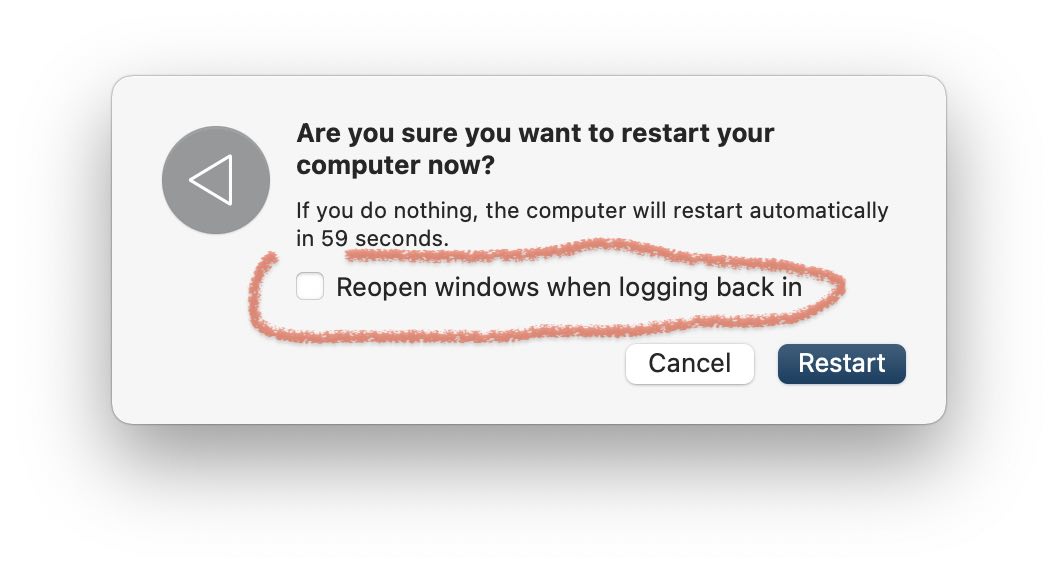
- Have your Mac restart more quickly— The Macs of old always started up as a tabula rasa, or blank slate. That is, they started up with no programs running and everything reset to default. Later, Macs gained a default option to try to save the state of all running applications are restore that state when you restarted the computer. Back in the days of spinning hard drives, this could add a minute or more of waiting time for your computer to immediately load up all the applications you were running when you shut down. The wait is not so bad now with solid state drives, but I still prefer my Mac to start up as quickly as possible, fully open to all possibilities. Whenever you go to the menu and choose restart, you will see a checkbox for whether your Mac should reopen all applications. I turn that off.
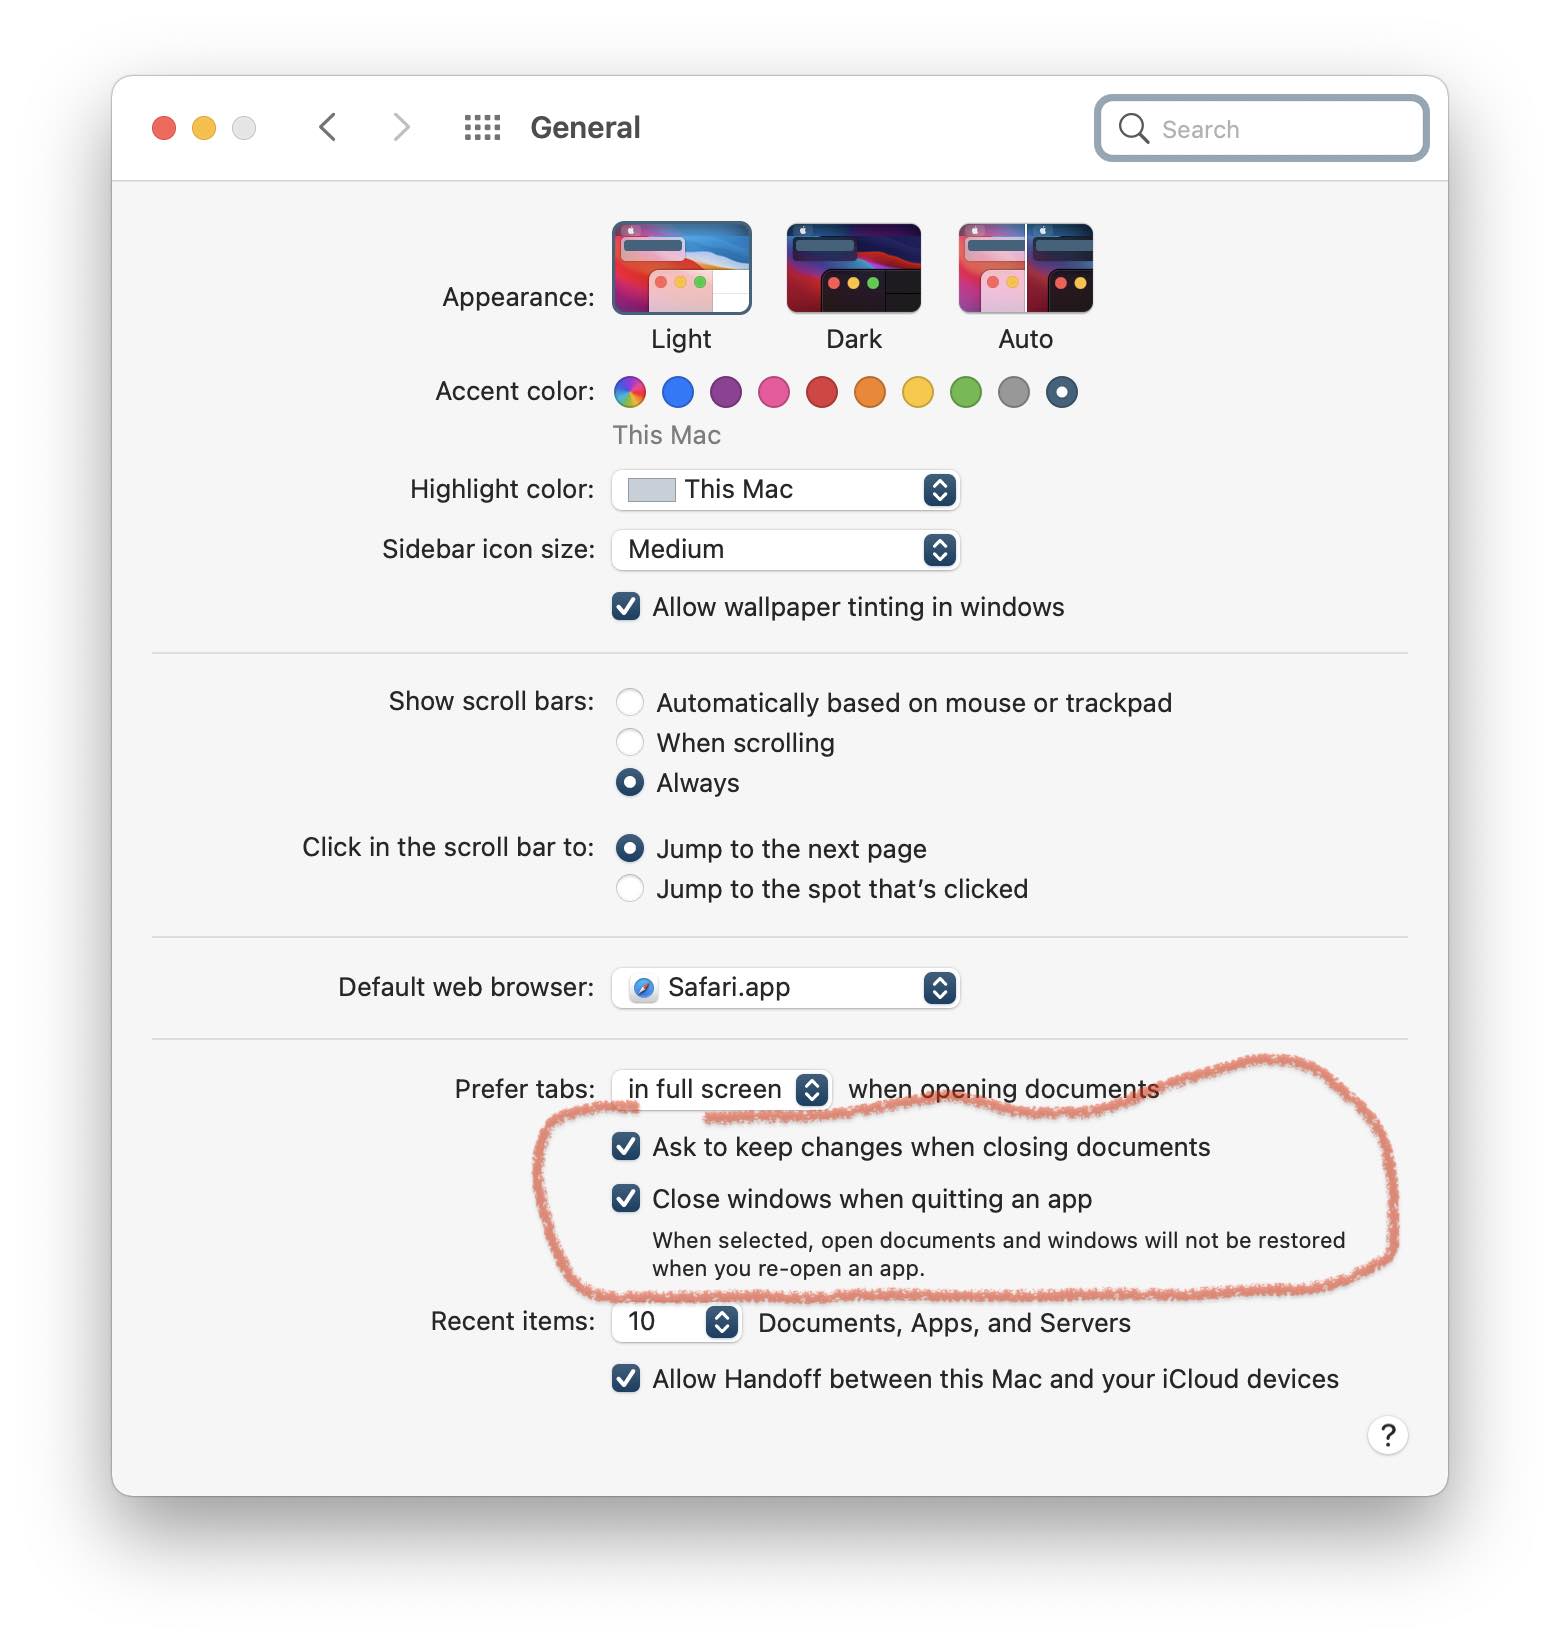
- Take back your choice on whether to save your files— A feature of the Classic Mac OS that I always loved was that it would always ask you if you wanted to save any unsaved changes to your work if you tried to quit an application or restart the whole computer. Apple even made that better in Mac OS X by including a subtle shadow on the red close button if your file had unsaved changes. Starting with Mac OS X 10.7 Lion, Apple made some bold changes to make a modernized Document Model that would free users from the tyranny of having to know where they were saving their file. It also meant that they didn’t have to worry about saving their files. I have seen people who accidentally keep saving over and over the same document because of this new document model, so I always like to explicitly manage saving my files by hand. So I go to the System Preferences: General and then put a checkmark next to Ask To Keep Changes When Closing Documents and also Close Windows When Quitting An App.
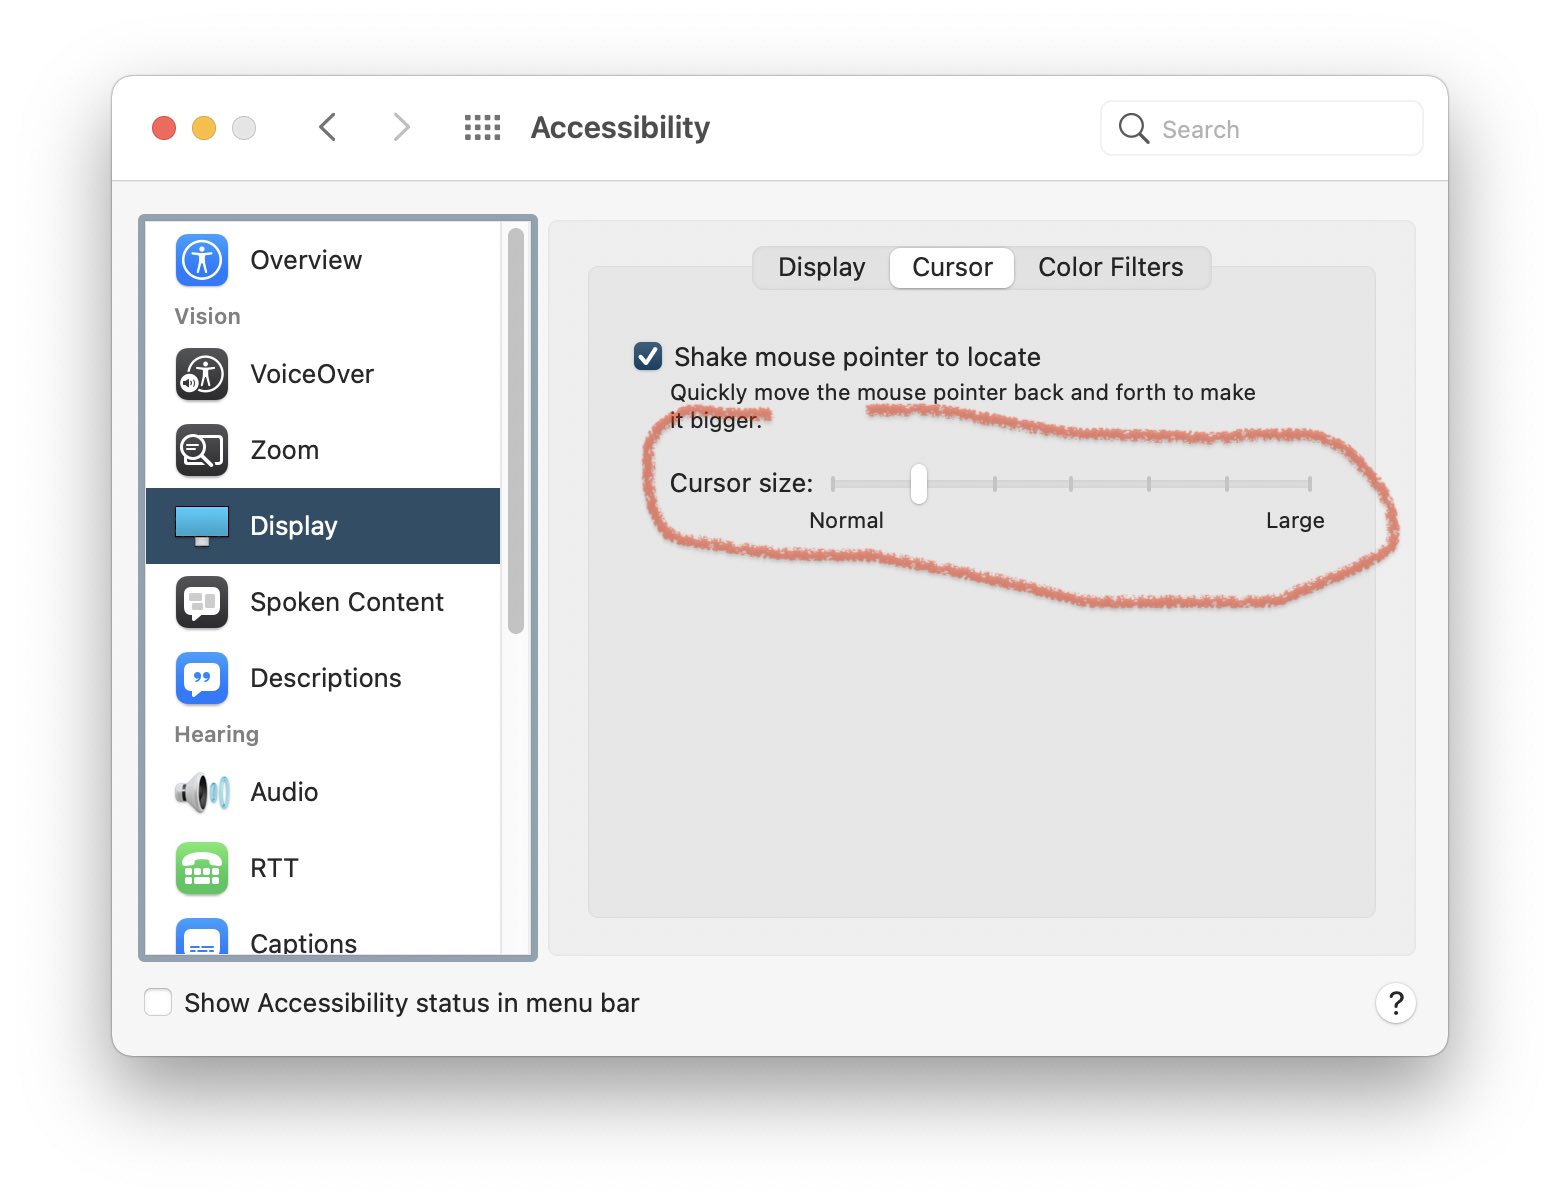
- Make the cursor easier to see— I love my big screened Macs, but that extra screen real estate does make it easy to lose track of the cursor. So I like to go System Preferences: Accessibility: Display: Cursor and then raise the Cursor Size Slider by one step.
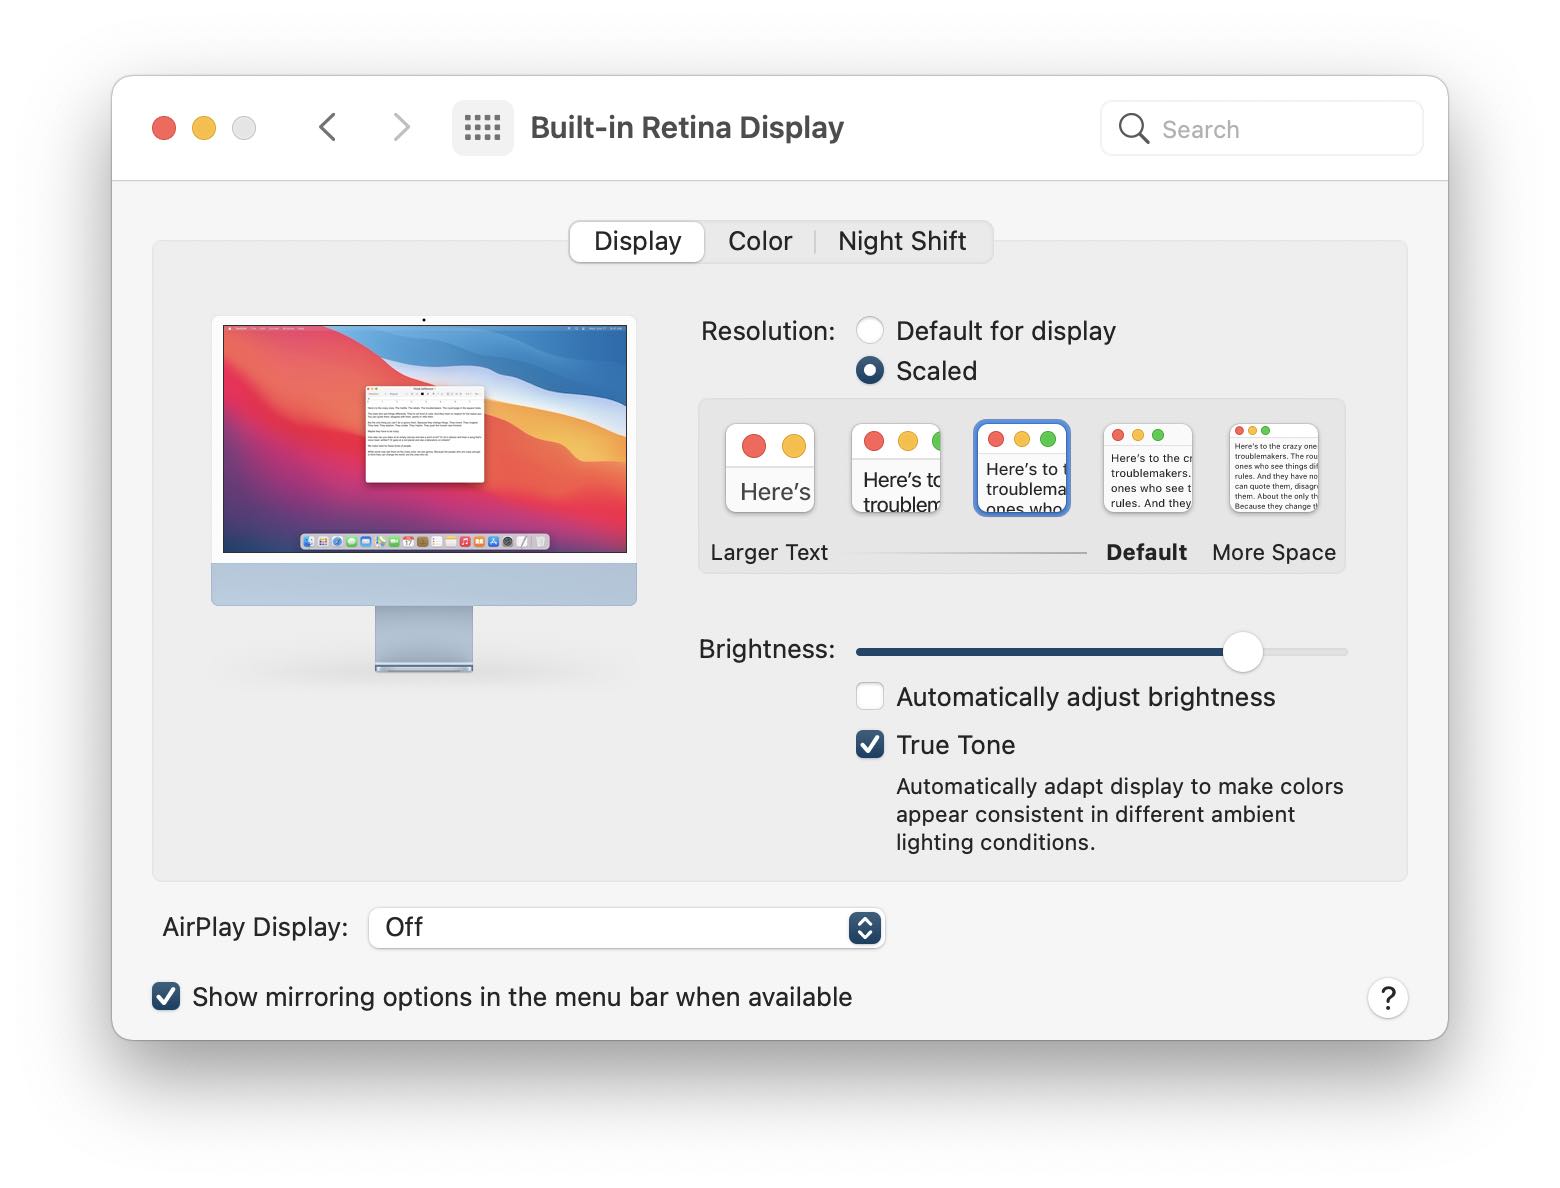
- Just make everything more legible— For some reason Apple’s large screened iMacs are perfectly comfortable for me at their default setting of 220 PPI (points per inch) but on the smaller screened laptops, my eyes are starting to bother me. So if I feel like it is hard to read things on screen, I will go to System Preferences: Displays and change the Scaling.

Clicking on the Scaled options will give you a few different sizes to choose from. It’s a bit counterintuitive, but by showing less points on screen, they all have to be stretched larger to fill the screen, so everything instantly gets a big bigger. Notice the difference in size between the screenshot below and the previous screenshot?